Heininger Auditorium
Larrance Academic Center

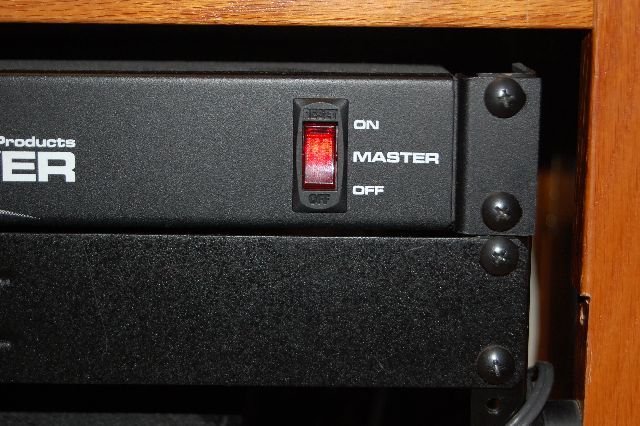
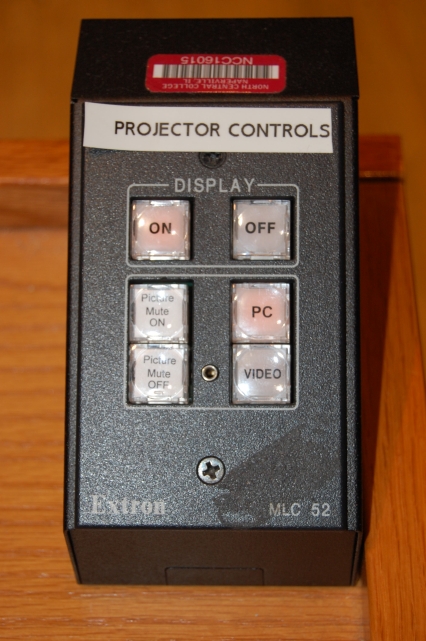
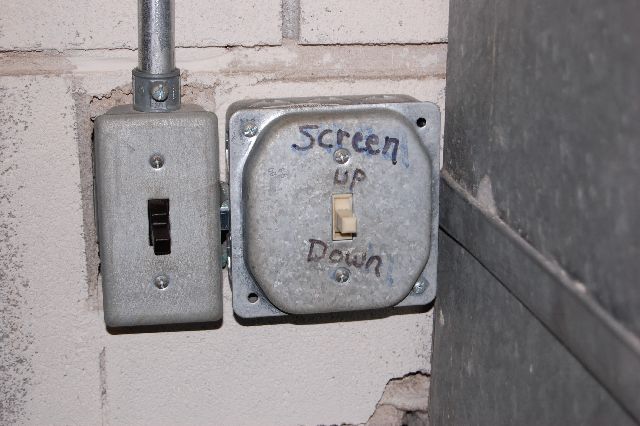
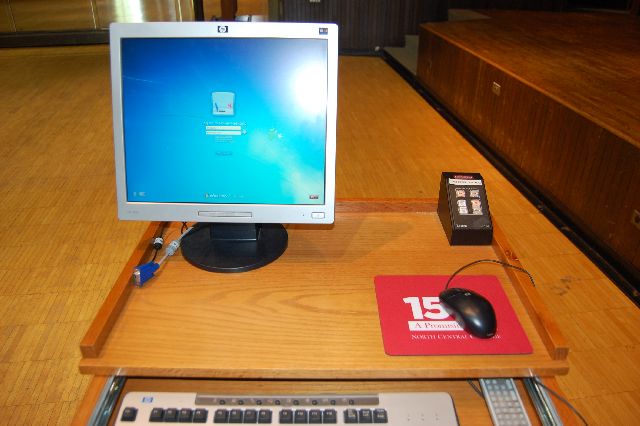
Heininger Auditorium, located in the Larrance Academic Center, has a ceiling mounted data and video projector, electrically controlled screen, and enhanced sound system. The equipment is located in a lectern near the foot of the stage.

Additional microphones or audiovisual equipment may be requested for use in this room. Please contact Instructional Media for additional equipment.


Step 1

Press the "Main Power" button to turn on all of the equipment in the lectern. The "Main Power" button is located at the top of the equipment rack, on the right side.

If the desired piece of equipment doesn not turn on, press the power buttons for the desired piece of equipment. These buttons are located on the front panel of each item.

Step 2

Use the projector controller located on the top of the lectern to power up the data projector. Press the "on" button and wait a few seconds for the projector to warm up.

(see close up image in Step 3)

Step 3 Select the source for the projector by pressing "PC" for the computer or "Video" for the DVD/VCR.
Step 4 Lower the projection screen. The screen is electrically activated and the switch is located back stage, next to the stage right door.
Hint To prevent images from appearing on the projector momentarily - while browsing files or setting up PowerPoint for example - press the "Picture Mute On" button on the projector controller. The projected image will go black, but the projector will remain on and instantly reappear when "Picture Mute Off" is pressed.
Step 5 Adjust lights to desired level. The lights cannot be dimmed, however, there are multiple banks of lights that can be turned off to achieve the level needed for optimum projection.

The light switches are located backstage, next to the stage left door.
Step 6 Volume for the computer and DVD/VCR can be adjusted by turning the volume knobs labeled for each piece of equipment.

Please note the "Master" knob also needs to be turned up.
Hint

Computer volume may also need to be adjusted using the volume control located in the task bar of the computer - next to the clock.

 
Step 7

A stereo mini cable is available to connect to the headphone jack of a laptop PC or an iPod. This cable is hanging on the front panel.

Plug the 1/8 stereo mini into the iPod. Use the "PC/iPod" knob on the mixer to control the volume.

Hint Connecting a laptop computer to the projector is easy. Locate the HD15 monitor cable laying on the top of the lectern. Connect the cable to your laptop computer's external monitor port. The lectern will automatically detect the laptop and switch the projector from the desktop computer to the laptop.

Hint If the signal does not switch automatically, turn on the external monitor port of your laptop. Generally, this is a combination of keystrokes such as press and hold the FN key, then press F5. Consult the laptop's user manual.  
Hint To switch back to the desktop computer, simply unplug the HD15 cable from the laptop computer.  
OFF 1

To turn off the equipment, press the "Off" button on the projector control unit.


OFF 2 Press the main power button on the lectern to turn off all of the other equipment.


Revised 12-11
Send comments about this page to Tom Gill, Instructional Media Coordinator tmgill@noctrl.edu